Reselling is a great way to generate points, miles, and meet minimum spend. Fulfillment by Amazon makes reselling much easier, because Amazon takes care of most of the heavy lifting. Of course, there are a lot of ins and outs to understand about Fulfillment by Amazon (FBA) to really get the greatest value out of it. This posts discusses the things you need to know about shipping into Amazon.
Read Also:
- Beginner’s Guide to Fulfillment by Amazon: Start Here
- Beginner’s Guide to Fulfillment by Amazon: Setting up an account
- Beginner’s Guide to Fulfillment by Amazon: Analyzing and adding a product
- Beginner’s Guide to Fulfillment by Amazon: Shipping 101
- Beginner’s Guide to Fulfillment by Amazon: Shipping 201
- Beginner’s Guide to Fulfillment by Amazon: Updated! Shipping Info You Need to Know
- Beginner’s Guide to Fulfillment by Amazon: Ungating Product Categories
- Beginner’s Guide to Fulfillment by Amazon: Amazon Seller App
- Beginner’s Guide to Fulfillment by Amazon: Amazon Seller App Part 2
- Expert Guide to Fulfillment by Amazon: Dealing with Returns
Shipping
I’ve written about shipping in the past, here , here and here, but, it really is a pretty big part of working with FBA. Of course Amazon loves to make changes.
A lot of things factor in to how things go with shipping. It’s one of the costs I try hard to cut down. One way, is that Amazon will allow you to send multiple products in the same shipment, which in turn reduces the cost of shipping per item. This is where things can get complicated, and where there are some workarounds, so despite me trying to avoid arrows, I’ll walk you through how to do this.
Warning red arrows ahead.
This can get complicated (it took me a few times to get it right), so bear with me on the bullets and such.
- Select the items you want to ship together.
- Click on “Actions” tab
- Under the main action tab select send/replenish inventory.
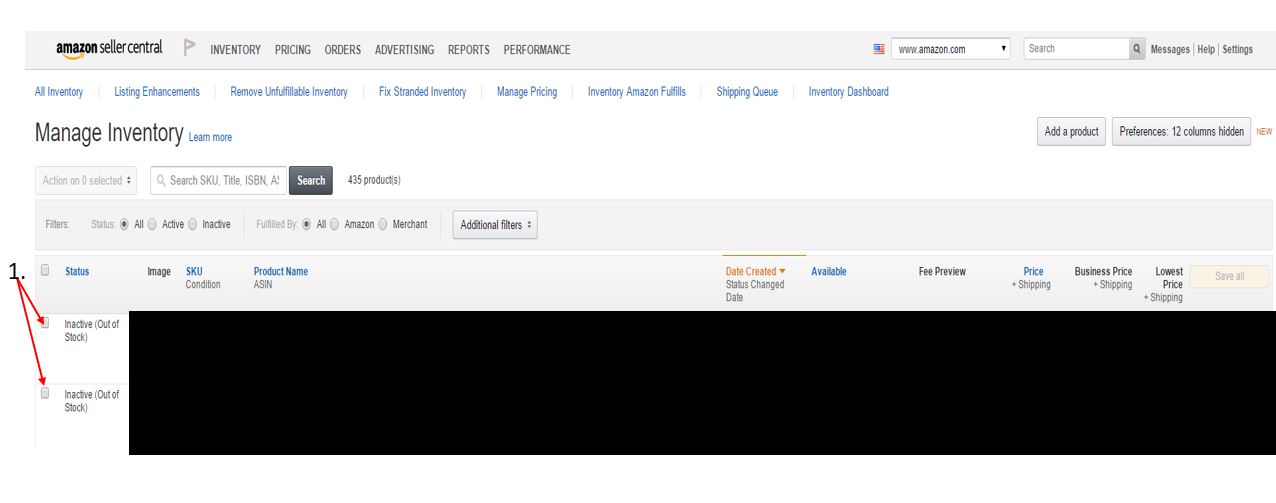
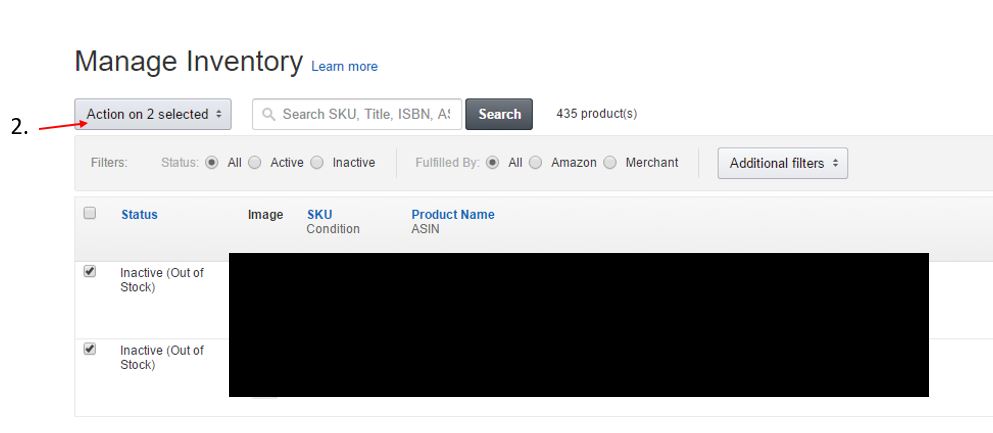
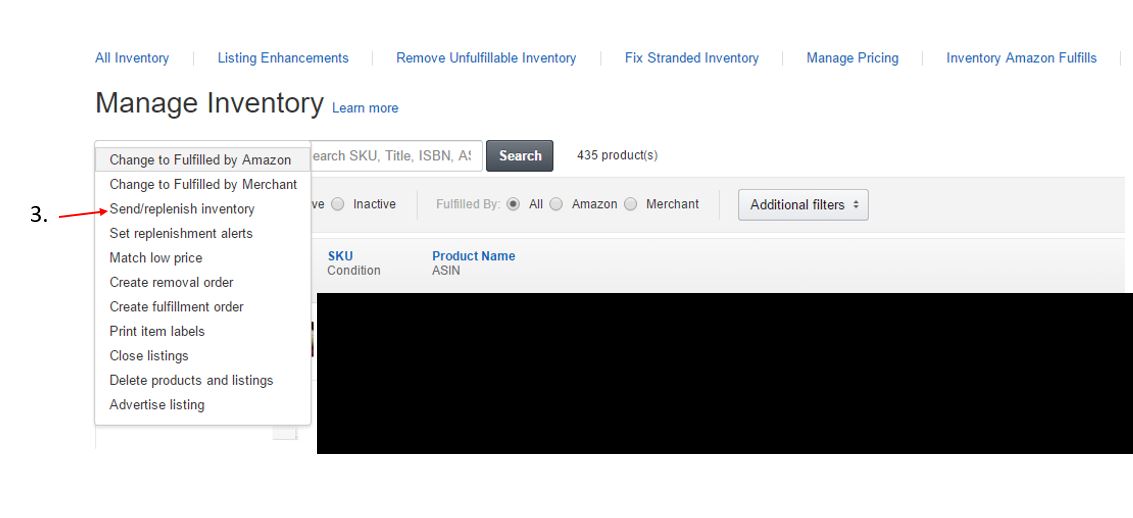
You’ll be sent to the normal send/replenish area. Click on the “Yes, continue”

This is where you’ll start to see options.
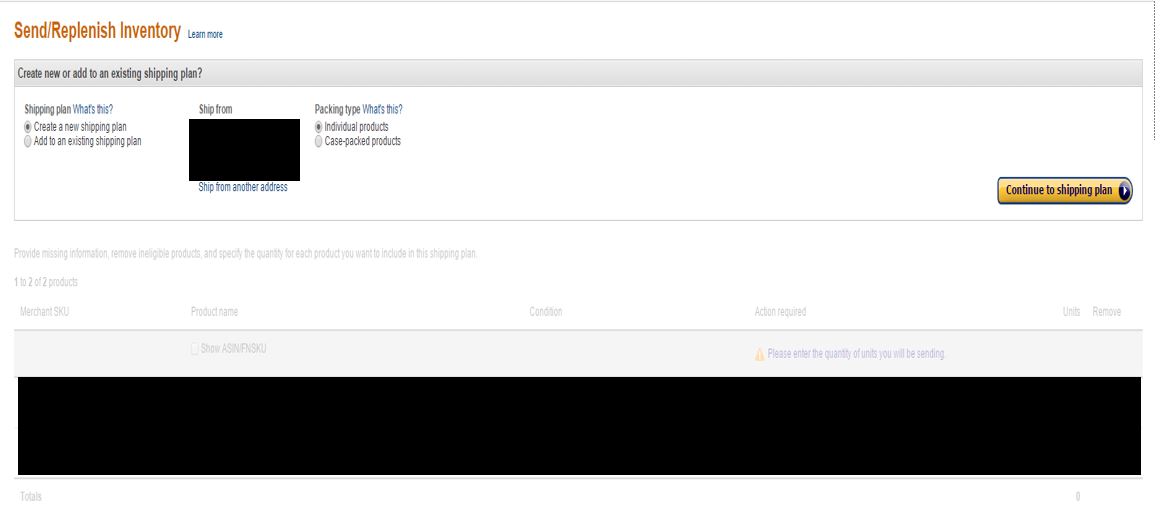
Easiest option is to select the individual products. Set the number of each item that you are sending. Click continue.
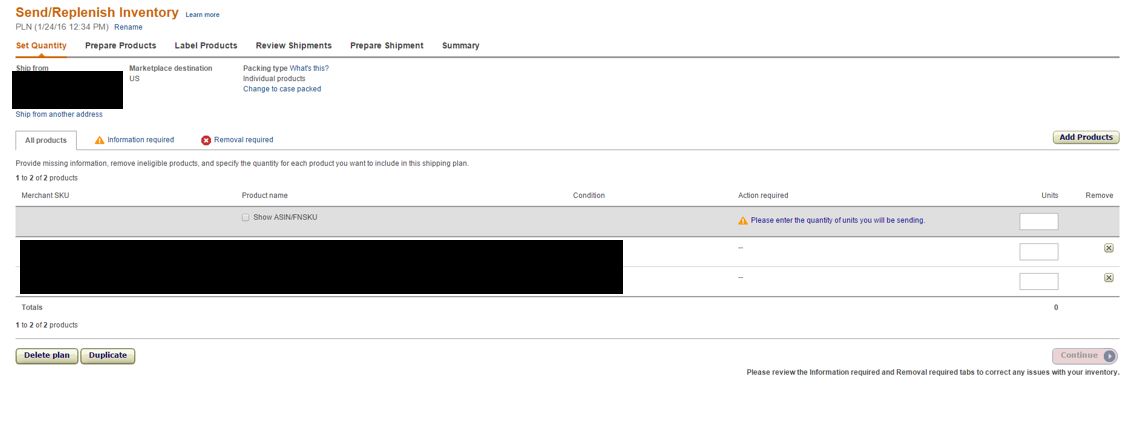
Going with case packed can be a bit more convenient when trying to ship to one location. Set the number of units in each case and the number of cases you’ll be sending in then click continue. 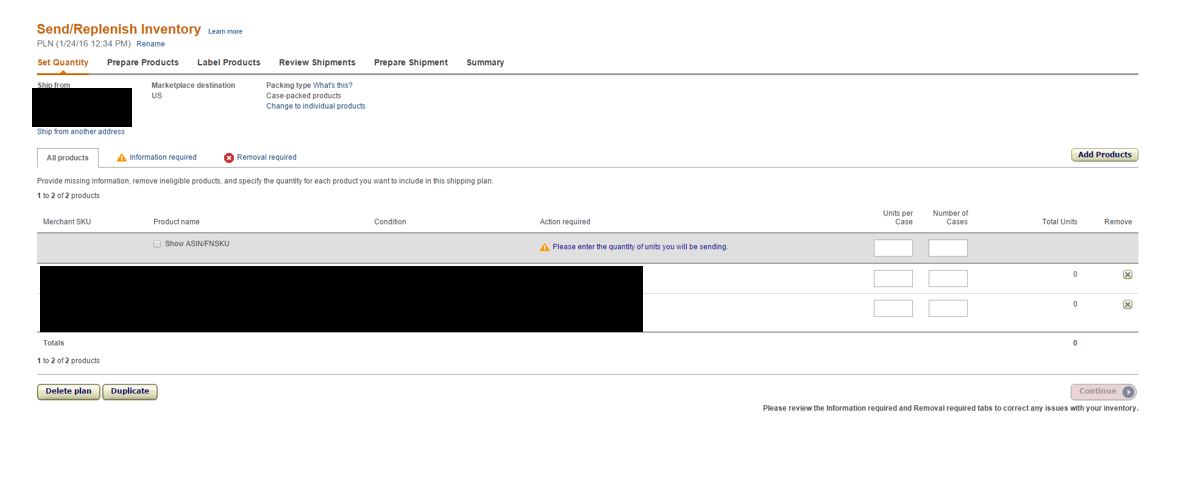
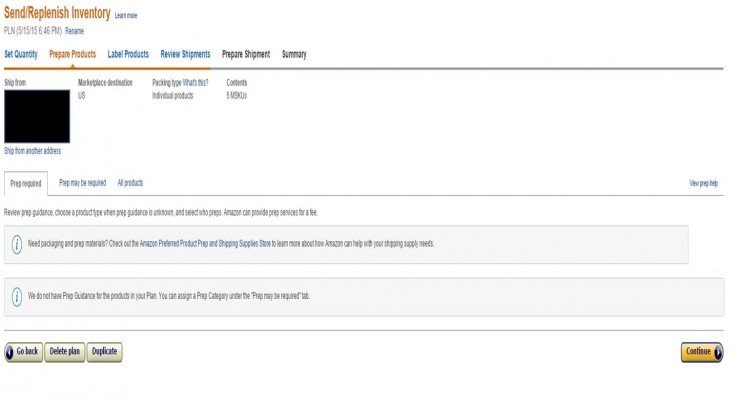
Next you’ll see a prepare products screen, it you need to bubble wrap or do anything special for the items in your shipment this is where Amazon will tell you. Otherwise click continue.
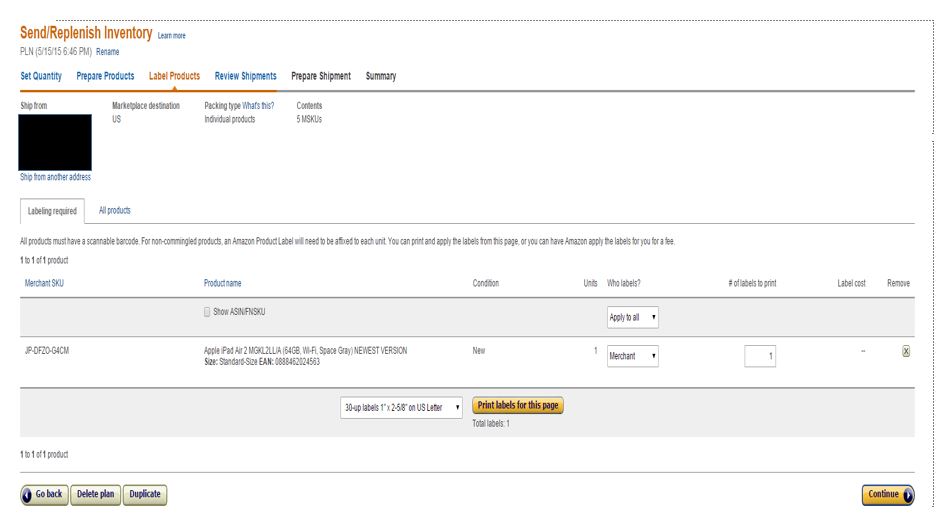
For non-commingled products you or Amazon will need to label the products. I highly suggest going non-commingled, because you control the inventory, and if you have returns it should be the item that you sent in. If you want to let Amazon to label for you there is a small cost ($0.20 per label).
After printing the labels select continue.
Review the shipment. Amazon might tell you that you need to send to multiple locations if that happens, Amazon will show multiple shipments and the number of units & MSKU’s for each one. If you click on the view shipment contents it’ll list the items and quantity of each for that shipment. In some cases, you can avoid multiple locations by opting to label products on your own or not having over-sized items.

Click on approve shipment and you’ll see the approved shipments. Click on “Work on Shipment” for the shipment you want to work on.

You’ll be brought to the “prepare shipment screen.”
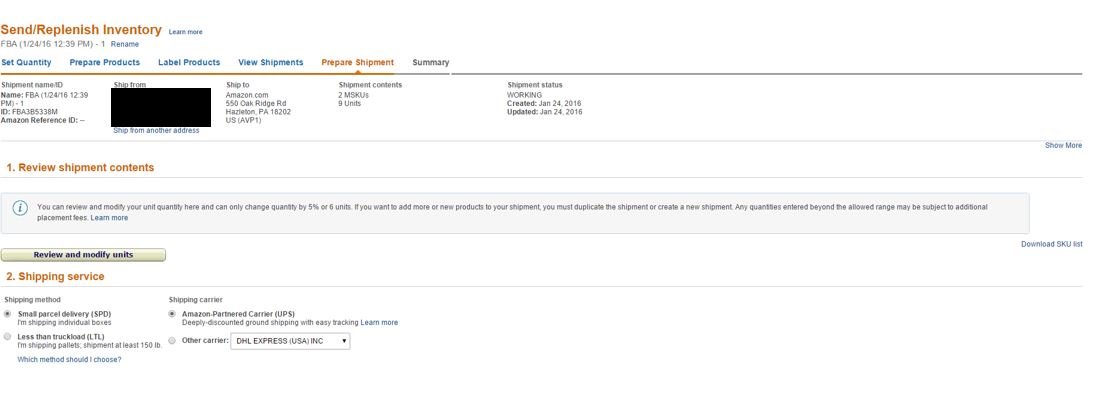
I’ve yet to change anything in the the review shipment contents or shipping services, so I’m going to skip on down to #3 Shipment packing, however if you really wanted to, you could modify the units shipped, although I think Amazon limits you to changes less than 5% of each individual item, or 6 units (note: fixed thanks to MMKate).
Amazon instituted a new system in Shipment Packing:
There are three options you can choose from the drop down:
- Everything in one box
- One SKU per box
- More than one SKU per box
If at all possible try to get everything in one box or one SKU per box. Don’t worry about the number of boxes as amazon charges for the shipment based on the total shipment weight.
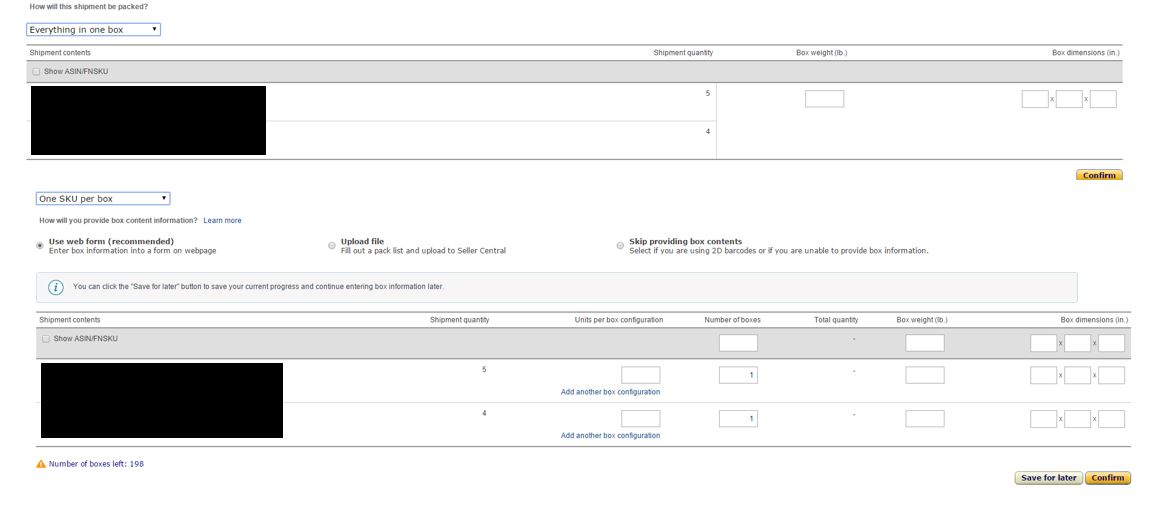
You just need to set the weight for the “Everything in one box” option. For the “One SKU per box” option you need to set units per box, number of boxes and box weight. Both are pretty easy and straight forward.
The last option of “More than one SKU per box” get more complicated. As you box and weigh them you need to keep track of what you have put in each box.
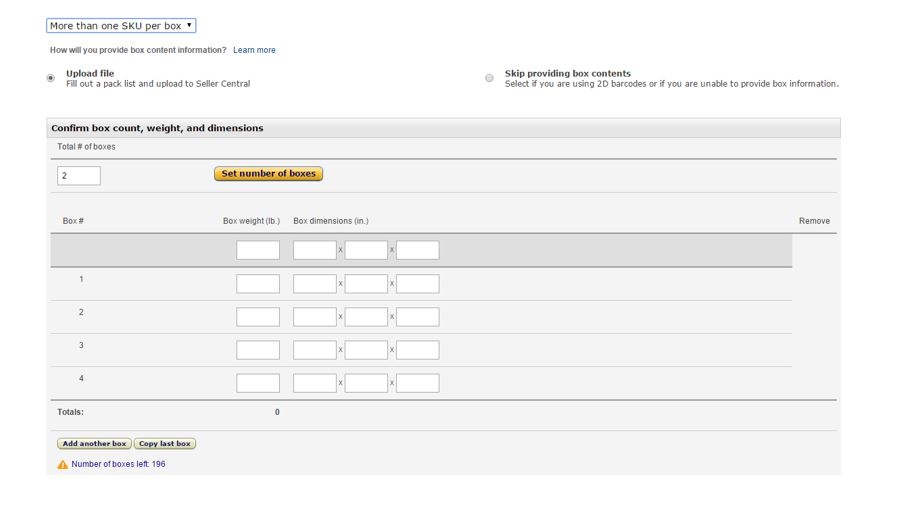
You’ll set the box weight for each box then will be asked to upload the pack list. I’ll go into this in a later post as it is a bit time consuming. But briefly, you can do one of two options. You can download a packlist (it downloads as a .csv, so right click, and open with Excel for ease). The other option, is populating what is in each box, through Amazon’s on screen system. Again, I’ll have a more detailed post on this coming soon.
For this example I’ve gone with the everything in one box option and entered the weight.
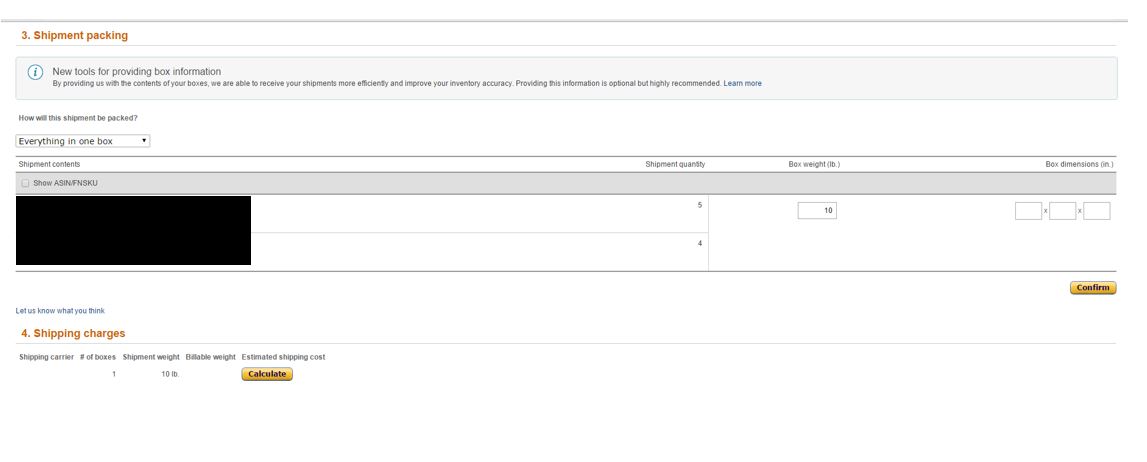
Once the weight is entered click “confirm.” Then in Shipping charges click “calculate.” Amazon will calculate the cost and you will be asked to approve the shipment.
Then you can print the box labels.
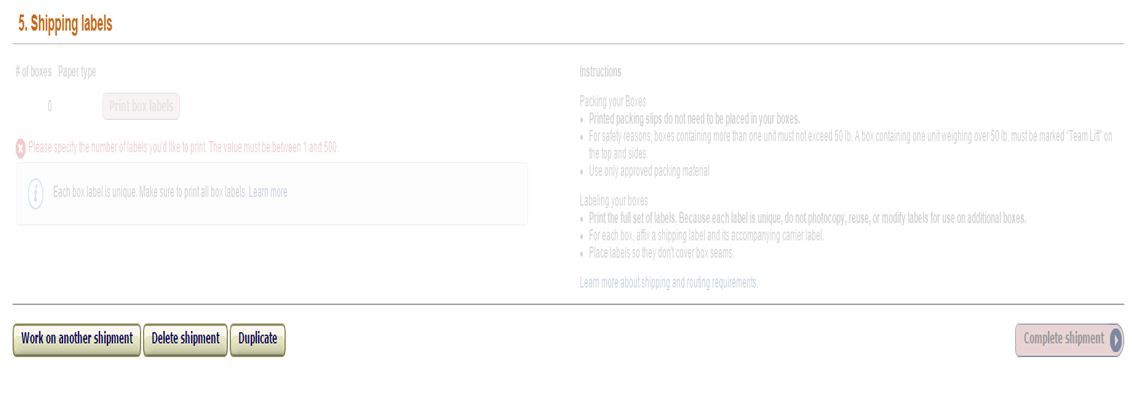
Once you’ve printed the label click on the complete shipment. After you’ve completed the shipment, you see a summary. You can return here to track your shipment.
A few points you’re not quite right on…
Having sent in a couple of hundred boxes over the past few years, the number of boxes in your shipment does affect the postage price – unless something has changed in the last 2 months since I fiddled around with those numbers. You are still paying that initial $3-4 on each box, plus the weight. In other words, one 40-lb box costs less than two 20-lb boxes.
When modifying your shipment, you can increase the number of each individual item by 5% or 6 units. So if your shipment is set to include 4 of Widget A and 4 of Widget B, you can actually send in up to 10 of both. I love this – it means I can fill up a box with more if there’s leftover space and optimize shipping costs.
I didn’t realize that doing your own labeling affects your shipment destinations, but I just started doing it myself a few months ago, and it does indeed coincide with a vast reduction in west coast shipments (I’m in Florida). I also started getting some warehouse in Wisconsin that is pretty inefficient; I’m hoping that is just due to the Christmas season and not the labeling so it’ll stop appearing in my plans.
@MMKate, on box price – I’ll have to double check, I didn’t think that was the case recently. I’ll play around with it.
– Modifying shipment, fixing that, thanks for the correction!
– Labeling seems to be weird. Trying some new stuff, so hopefully will have some more datapoints soon.
Maybe we’ll have that all figured out by the time we meet at your ResellingDO 🙂 I’ll also be asking about the significance of capitalizing DO. I think I missed a memo somewhere in the miles/points blogosphere about that.
@MMKate – Hopefully! As far as the significance of a “DO” – here’s Matt’s take, which I think is appropriate: https://saverocity.com/travel/knowing-made-epic/
Ah, didn’t realize the term was British, probably because I lived there for 8 years and lost track of what is British and what is American. Last time that happened was when I told some friends I was going on a “weekend bender” in Vegas and they looked at me like I was speaking Greek. Oops.